

Installing Parking Sensors on Your Car: A Complete Guide & Price Overview
- Parking sensors (ultrasonic) vs. reversing cameras: They serve different needs—acoustic obstacle detection versus direct rear-view visualization.
- DIY Installation: Installing a wired or wireless kit typically takes one to two hours using basic tools.
- Professional Installation: Auto centers like Norauto or Feu Vert offer professional fitting via appointment, with quotes based on your vehicle model.
- Troubleshooting: Most parking sensor failures are caused by dirty sensors, blown fuses, or oxidized connectors.
- Rental Cars: If you are driving a rental, check if the vehicle already has these features before considering any additions.
Are you looking to install parking sensors because reversing into a tight spot stresses you out, or because your Clio, Zoe, or 208 didn’t come with this option? The best solution depends on the type of equipment you want: parking sensors (ultrasonic sensors that beep) or a reversing camera (an image displayed on a screen), which can be either wired or wireless. While a universal kit is accessible to any skilled DIYer, professional installation at an auto center like Norauto or Feu Vert is faster and comes with a guarantee. This guide details the steps, current prices, most popular models, and the most common faults when sensors stop working.
Parking Sensors vs. Reversing Cameras: What’s the Difference?
These three terms are often confused during online searches, but they refer to distinct technologies. Parking sensors (also called reversing sensors) are the generic name for rear parking assistance systems based on ultrasonic sensors. Each parking sensor is a small, round disc integrated into the bumper that emits ultrasonic waves; when an obstacle reflects these waves, an electronic control unit calculates the distance and triggers an acoustic signal that speeds up as you get closer.
A reversing camera, on the other hand, does not measure distance. Instead, it transmits a real-time image to a screen (on your dashboard, rearview mirror, or a dedicated mount), often with overlaid guidance lines. Some kits combine both technologies to provide both acoustic alerts and visual cues, which is particularly useful for spotting low obstacles like a bollard or a child’s bike that might be invisible to ultrasonic sensors mounted higher up on the bumper.
For daily city driving, parking sensors are sufficient in most cases. However, for occasional driving in a vehicle you aren’t familiar with—such as a tourist driving a rental car—a camera provides extra comfort by giving immediate visual feedback without needing to interpret beeps.
How Ultrasonic Parking Sensors Work
The physical principle remains the same across all kits. The sensor emits an ultrasonic wave that is inaudible to the human ear. This wave travels until it hits an obstacle and then bounces back to the sensor. The kit’s electronic control box times this “round trip” to deduce the distance, with enough precision to distinguish between a nearby wall and a further-away pole.
Most aftermarket kits include four sensors spread across the width of the rear bumper, connected to a central control box which is then linked to a buzzer or the car’s audio system. The acoustic signal becomes continuous when the distance drops below a critical threshold, usually around 30 centimeters, at which point you should stop immediately.
The most common technical limitation involves thin or textured obstacles: a bicycle chain, a very narrow metal pole, or surfaces that absorb waves (such as vegetation or fabric) may not be detected accurately. This is why combining sensors with a camera is the most reliable configuration, especially for occasional drivers who may not instinctively check the blind spots of an unfamiliar vehicle.
Wired vs. Wireless (Wi-Fi) Reversing Cameras: Which to Choose?
A wired reversing camera remains the gold standard for reliability. The video signal travels through a cable run to the front of the vehicle, ensuring no latency or interference. The downside is the installation time, as the cable must be routed through the car’s body—usually following door seals or the floor—which may require removing some interior trim.
A wireless reversing camera transmits the image via a radio link (often 2.4 GHz) to a receiver located near the screen. Installation is significantly faster since you only need to connect a single power cable at the camera end. However, transmission can occasionally suffer from micro-cuts or slight lag, especially near other devices operating on the same frequency.
A Wi-Fi reversing camera is an even simpler alternative: it creates its own network and displays directly on a smartphone via a dedicated app, requiring no built-in screen or cabin wiring. This is a great option for vehicles used occasionally, such as a rental van or a caravan, because the kit can be moved from one vehicle to another without modifying the car’s electronics. The trade-off is that you must monitor the battery life, and the image quality may be slightly lower than wired versions, especially in low-light conditions.
DIY Installation: Steps and Required Tools
Installing parking sensors at home is achievable with most universal kits sold on the market, provided you have basic tools: a drill with a bit matching the sensor diameter, screwdrivers, wire strippers, and a multimeter to check electrical connections.
The first step is positioning the sensors on the bumper, generally at a height between 45 and 65 centimeters from the ground, spacing them evenly to cover the full width of the vehicle. A cardboard template provided with the kit makes it easier to drill straight holes, which is essential for consistent detection.
Next, you must route the cables from each sensor to the electronic control box, which is usually mounted in the trunk. The wiring follows the inner contour of the bumper and then runs up through the wheel arch or under the trunk sill, making sure to avoid friction points with moving parts.
The final electrical connection is made to the reverse light: the reverse gear signal automatically powers the system as soon as the gear is engaged, requiring no permanent ignition connection. This step requires identifying the correct wire using a multimeter; the reverse light will show voltage only when the gear lever is in the “R” position.
A full test with the engine running and the gear engaged will allow you to verify everything is working correctly before reassembling the trim and the bumper (if it was removed for cleaner access).
Installing Sensors on Clio 3, Clio 4, Zoe, or 208
These four models are frequently searched for regarding parking sensor installation because they are widely used city cars that, depending on the trim level, may not have come with factory-fitted rear parking assistance.
On a Clio 3, the rear bumper is generally easier to remove than on later generations, making it simpler to run cables cleanly to the control box. On a Clio 4, access to the reverse light wiring is often available through the rear wheel arch, meaning you might not need to remove the entire bumper if you choose a wireless kit.
The Renault Zoe, being an electric vehicle, requires extra caution: you must avoid all contact with the high-voltage circuit and strictly limit yourself to the standard 12V circuit of the reverse light for power, just as you would on a combustion engine vehicle. If in doubt, using a professional auto center is the safest route for this type of powertrain.
On a Peugeot 208, the bumper often features pre-formed plastic inserts that simplify drilling at the manufacturer-recommended locations, providing a helpful guide to maintain the original installation height even with an aftermarket kit.
In all cases, it is recommended to check the kit’s compatibility with your car’s color if you want painted sensors, and to keep your vehicle manual handy to identify the correct fuse location if your kit connects via the cigarette lighter rather than the reverse light.
Professional Installation at Norauto or Feu Vert
For those who prefer not to touch the bumper or the wiring, professional installation at an auto center is the easiest option. An installation at Norauto is typically done by appointment, following a quote based on your vehicle model and chosen kit (sensors only, camera, or both). They often stock several ranges of kits in-store, with the option to have sensors painted to match your vehicle’s color.
Installation at Feu Vert follows a similar principle: a technician performs the drilling, wiring, and testing in the workshop, providing a guarantee on the installation that usually covers mounting defects for a set period. The main advantages of these two networks are speed—appointments can often be completed within half a day—and the traceability of the work, which is useful for vehicle resale or future claims.
The price depends heavily on the type of kit: a sensor-only kit is significantly cheaper than a reversing camera with a dedicated screen, and labor costs vary depending on how difficult it is to access the bumper on your specific model. Requesting a detailed quote beforehand, specifying your exact model and year, will help avoid surprises regarding kit compatibility.
Troubleshooting: What to do when your sensors stop working
A malfunctioning parking sensor rarely means the entire electronic control box has failed; in most cases, the issue is simpler and can be fixed without replacing the whole kit.
The most common cause is a dirty sensor: mud, packed snow, or residue from a high-pressure car wash can obstruct the emitting membrane, preventing the ultrasonic wave from traveling correctly. A simple cleaning with soapy water and a soft brush is often enough to restore detection.
Next is a blown fuse, particularly after recent electrical work on the vehicle or a power surge. The fuse dedicated to the parking system is usually located in the cabin or engine fuse box and can be identified in your vehicle manual.
An oxidized or disconnected connector at the reverse light or the control box in the trunk is another classic cause, especially in vehicles regularly exposed to moisture or road salt in winter. A visual inspection of the connectors, combined with a multimeter test to check continuity, can help isolate the break.
Finally, a physically damaged sensor from a light bump in a parking lot often results in a continuous or erratic beep rather than a total lack of signal. In this case, replacing only the damaged sensor is sufficient, without needing to replace the entire kit or the control box. Repairing parking sensors is therefore usually a targeted, low-cost intervention rather than a full replacement.
Parking Sensors and Rental Cars: What to Check Before You Go
For a tourist renting a vehicle for a trip, the question is rarely about DIY installation, but rather about checking in advance if the vehicle provided by the rental agency already includes rear parking assistance, such as sensors or a camera.
This information is usually found in the vehicle description during booking, or you can ask the rental agency directly. When booking a city car to drive through historic centers, narrow streets, or tight tourist parking lots, having parking sensors or a camera makes maneuvering significantly easier—especially on a model where you are discovering the dimensions and blind spots for the first time.
If the car lacks original equipment, some agencies offer optional accessories, such as a wireless or Wi-Fi reversing camera with a temporary mount, which requires no modification to the rental vehicle’s electronics. However, this is only a viable option if the rental company explicitly authorizes it, as any unapproved modification can be contested during the vehicle return inspection. Therefore, when renting, it is best to prioritize a model that is already equipped rather than considering any installation, even temporary, on a vehicle that does not belong to you.
What is the difference between parking sensors and a reversing camera?
Parking sensors use ultrasonic sensors to emit an acoustic signal based on the distance to an obstacle, whereas a camera displays a visual image of the rear of the vehicle on a screen without automatic distance measurement.
Can I install parking sensors myself without mechanical skills?
Yes, for a basic universal kit, provided you have simple tools (drill, screwdriver, multimeter) and follow the instructions, particularly to locate the reverse light wire that powers the system.
How long does professional installation take at an auto center?
At centers like Norauto or Feu Vert, installation is generally completed within half a day by appointment, depending on the kit type and the complexity of accessing the bumper on your specific model.
Why are my parking sensors no longer working?
The most frequent causes are sensors clogged with mud or snow, a blown fuse, an oxidized connector in the trunk, or a sensor damaged by a minor impact.
Are wireless reversing cameras reliable?
They are easier to install than wired models but may experience slight signal drops or image lag due to interference, whereas wired versions remain more stable.
Can I install parking sensors on an electric Renault Zoe?
Yes, as long as you connect the kit only to the standard 12V circuit of the reverse light and never interfere with the vehicle’s high-voltage system.
Do rental cars always have parking sensors?
No, it depends on the model and the trim level provided by the rental company; it is recommended to check this in the vehicle specifications or ask the agency before booking.
What budget should I set for professional installation?
The cost varies depending on the kit chosen (sensors only, camera, or both) and the labor required for your specific model; getting a precise quote from an auto center is the best way to get an accurate figure for your vehicle.
Sources
- Norauto – Parking Sensors
- Futura Sciences – Parking Sensor Comparison
- Oscaro – Parking Sensors and Detectors

À découvrir
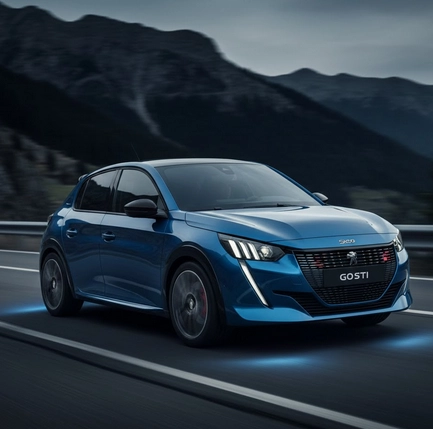
Peugeot e-208 GTi 2026: Price, Range & Performance
Discover the 2026 Peugeot e-208 GTi: 281 hp, 0-62 mph in 5.5s, starting from €42,900. The electric legend returns with all the details you need.

🚗Car Accessories: 2026 Guide & Top Essentials
November 7, 2026
Engine Oil Change: When & How? Complete Guide
November 4, 2026